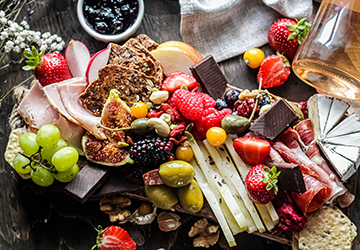
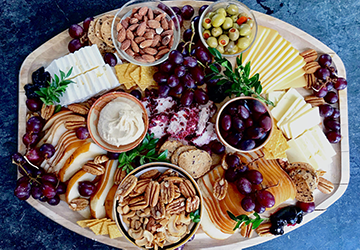
When it comes to entertaining, one of the most popular and versatile appetizers you can serve is a gourmet cheese platter. Cheese platters are simple to assemble, require no cooking or baking, and are always crowd-pleasers. In this article, we will lead you through the steps of preparing a gourmet cheese platter in only ten minutes. From selecting the right cheeses to arranging them attractively, you can create an impressive and delicious appetizer that your guests will love.
Why a Cheese Platter is the Perfect Party Food
There are several reasons why a cheese platter is the perfect party food. For starters, it's a simple and quick appetizer that can be assembled in minutes, which means you have less time in the kitchen. Cheese platters are a crowd-pleaser and can be tailored to meet guests' varying preferences and dietary restrictions. Additionally, a well-crafted cheese platter is visually appealing and can be the centerpiece of any gathering.
Choosing the Right Cheeses
Selecting the right cheeses is essential for a successful cheese platter. The key is to aim for various flavors, textures, and types of cheese. You should choose three to five different types of cheese. Some popular cheese options include:
1. Soft cheese, such as brie or camembert
2. Hard cheese, such as cheddar or gouda
3. Blue cheese, such as Roquefort or Gorgonzola
4. Aged cheese, such as parmesan or asiago
5. Fresh cheese, such as goat cheese or feta
It's essential to include a mix of mild and intense flavors and different textures, such as creamy, crumbly, or firm. You can also choose cheeses from other regions or countries to add variety and interest.

Selecting Accompaniments
Accompaniments are an essential part of any cheese platter. In addition to enriching your platter's overall appearance, accompaniments contribute to the flavor and texture of the cheese selection. They can help to balance out any particularly pungent or strong-tasting cheeses. Some popular options include:
● Crackers or bread
● Fresh or dried fruit
● Nuts, such as almonds or walnuts
● Olives or pickles
● Jams or honey
● Cured meats, such as prosciutto or salami
Again, aim for various flavors and textures to complement the cheese. It is always wise to consider any dietary limitations that your guests may have, and providing vegetarian, gluten-free, or dairy-free options is a thoughtful gesture.
Arranging the Cheese Platter
Once you have selected your cheeses and accompaniments, it's time to arrange them on a platter. Start by placing the cheese in different platter areas, leaving enough space for the complements. You can also use small bowls or ramekins to separate the various cheeses and add variety to the presentation. Consider adding labels next to each cheese to help guests identify the types of cheese.
To create an aesthetically pleasing cheese platter, aim to incorporate various colors and textures among the accompaniments. For instance, consider arranging berries or grapes alongside a bowl of nuts, or offer an assortment of crackers and bread. Leave ample space between items to enable guests to easily select and serve their preferred combination of cheese and accompaniments.
Enhancing the Presentation
Presentation is vital when it comes to a cheese platter. To enhance the production of your cheese platter, try incorporating some of the following tips:
● Use various serving dishes and bowls to add interest and height to the platter.
● To add a touch of color and aroma to your cheese platter, consider incorporating fresh herbs such as rosemary or thyme.
● Create a centerpiece with a large wedge of cheese or a sculpture.
● Use a wooden or slate platter for a rustic look.
Remember that the presentation should be both visually appealing and functional. Ensure your guests can easily access each item and the platter is manageable.
Quick Tips for Making a Cheese Platter
Here are some quick tips to help you make the perfect cheese platter:
● Keep the cheese at room temperature for at least 30 minutes before serving for optimal flavor.
● Don't overcrowd the platter. Leave enough space for guests to access each item quickly.
● Make sure to provide a separate knife for each type of cheese to prevent cross-contamination.
● Consider dietary restrictions when selecting your cheese and accompaniments.
● If you're short on time, consider purchasing a pre-made cheese platter from your local grocery store.

Conclusion
Creating a gourmet cheese platter in just 10 minutes is easy and fun. By selecting the right cheeses and accompaniments, arranging them attractively, and adding a few special touches, you can impress your guests with a delicious and visually appealing appetizer that is sure to be a hit. Remember to have fun with it and enjoy the process. Happy entertaining!
Frequently Asked Questions:
Q1: Can I make a cheese platter in advance?
A: You can assemble your cheese platter a few hours ahead and refrigerate it until serving. However, to ensure the freshness of any perishable accompaniments, it's recommended to wait until just before serving to add fresh fruit.
Q2: How much cheese should I buy per person?
A: Plan for about 2 ounces of cheese per person.
Q3: How do I store leftover cheese?
A: Store leftover cheese in an airtight container in the refrigerator. Soft cheeses should be wrapped in plastic wrap before storing.
Q4: Can I freeze cheese?
A: Most cheese can be frozen, but the texture may change upon thawing—hard cheeses, such as cheddar, freeze best.
Q5: Can I use a cheese board instead of a platter?
A: Yes, a cheese board is an excellent alternative to a platter. Just make sure to have enough space for all of your cheeses and accompaniments.


